Let’s be honest, there’s something magical about a full head of gorgeous hair. But not everyone wants to spend hours in a salon chair or drop hundreds on professional services. That’s where DIY hair extensions come in—they’re a total game-changer if you know how to blend them right. I’ve helped hundreds of clients and online followers nail their at-home looks, and today, I’m giving you my top five tips for seamless blending so your extensions don’t just look good—they look natural.
Whether you’re using clip-ins for a weekend event or playing with more semi-permanent methods, blending is the name of the game. And no, you don’t need to be a licensed stylist to get it right.
1. Match More Than Just the Color
Most beginners focus only on color, but if you’re aiming for seamless hair extensions, you need to go deeper. Matching texture is just as crucial. Are you working with straight, wavy, curly, or coily hair? Find extensions that mimic your hair’s pattern so they move and lay the same way.
SPONSOR AD
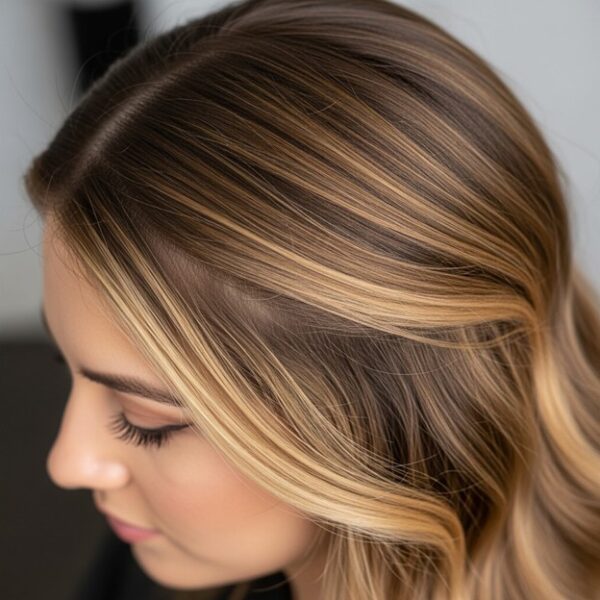
If your hair is color-treated or has highlights, try to pick a shade that matches your ends—not your roots. Most people forget this, but your natural hair color isn’t uniform from root to tip. A perfect match near the ends creates a more natural finish.
Pro Tip: When in doubt, go slightly lighter and tone the extensions to match. It’s easier to darken or tone down than to lighten synthetic or human hair extensions.
For the best place to get hair extensions, especially if you’re new to the game, check out this collection of premium extensions. They offer shades and textures that work with real hair types, making blending way easier.
2. Strategic Placement is Everything
Let’s talk technique. The biggest blending mistake I see is poor placement. The goal is to layer your extensions where your natural hair will naturally cover them. Place clip-ins or tape-ins starting from just above the nape and work your way up, leaving enough space between layers.
For fine or thin hair, avoid placing wefts too high near the crown. Instead, keep them closer to the mid-sections so your top layer can fully conceal the tracks. And always leave out a good perimeter of your real hair to frame your face and cover the extension edges.
Also, don’t overload your head with too many wefts. Too much volume can make your extensions obvious and hard to manage.
If you’re unsure how many pieces to use, start small. You can always add more—but taking out and re-styling mid-routine is just a headache.
Want more ideas on how to get started? I always recommend beginners visit The Glam House for tutorials and examples of proper extension placement.
3. Blend With Heat (But Gently)
Here’s where the magic happens: styling your natural hair and extensions together. The easiest way to achieve a natural look is by using a flat iron, curling wand, or blow dryer to blend them as one.
Take small sections of your natural hair and the extensions, then style them together. This helps “marry” the textures and ensures they move as one unit. Whether you’re going for curls, waves, or sleek and straight, always apply heat protectant first.
But—and this is a big one—don’t go overboard with heat. Too much can fry both your real hair and the extensions, especially if they’re synthetic or lower-grade human hair.
Pro Tip: Opt for loose curls or beachy waves for a super forgiving blend. Textured styles hide layering and length differences better than a stick-straight look.
4. Trim for a Tailored Finish
You know that freshly cut, layered look that makes hair bounce just right? That’s what you want to recreate. Blending hair extensions isn’t just about placement and styling—it’s also about shape.
Once your extensions are clipped or taped in, gently trim the ends to match your haircut. You don’t need to chop off inches—just remove any blunt or uneven edges. Point-cutting with scissors at a diagonal helps soften the line between your real hair and the extensions.
Important: Always cut the extensions while they’re in your hair, not before. That way, you can see how everything lays together.
Not comfortable cutting? Book a dry cut with a stylist after placing your extensions. It’s a small investment that can elevate your whole look.
5. Care is Part of the Blend
Even the most flawlessly applied extensions will look off if they’re dry, tangled, or poorly maintained. Taking care of your extensions is what keeps them looking natural—and keeps your real hair healthy underneath.
Stick to sulfate-free shampoos and wash gently. Avoid applying conditioner near the roots or clips to prevent slippage. Always brush from the ends upward, holding the hair at the top to reduce tugging. And never sleep with wet extensions—they’ll mat and become unmanageable.
For added longevity, store removable extensions flat or on a hanger to preserve their shape.
Styling Ideas That Work Every Time
If you’re feeling stuck, here are a few styling hair extension ideas that always help create a blended look:
- Half-Up Top Knot: Keeps the focus on your natural crown while hiding clip-ins.
- Soft Curls: Curl your hair and extensions together for a romantic, blended effect.
- Braids or Twists: These are great for camouflaging shorter layers and securing the extensions.
Experiment with a few styles until you find your go-to. The more you play, the more confident you’ll become.
FAQs
Q1: What type of hair extensions are easiest for beginners to blend?
A: Clip-in extensions are ideal for beginners. They’re easy to apply, remove, and adjust. Look for extensions that match both your color and texture to reduce styling effort.
Q2: Can I wear hair extensions every day?
A: You can, but it’s important to give your hair and scalp a break. Avoid sleeping with clip-ins, and never wear any extension style that feels too tight or heavy.
Q3: How can I make synthetic extensions look more natural?
A: Use dry shampoo to reduce shine, trim the ends for shape, and blend with a curling iron on low heat (if heat-safe). Also, make sure the extensions aren’t too thick compared to your real hair.
Mastering the art of DIY hair extensions takes a bit of practice, but with the right tools and techniques, you can create a flawless, natural-looking finish at home. Remember: it’s all about matching, blending, and caring for your extensions like they’re your own. Once you’ve got these fundamentals down, your at-home looks can rival any salon visit.
And if you’re ever in doubt about where to start or what to buy, don’t forget to explore the best place to get hair extensions online or visit The Glam House for more expert guidance.
You’ve got this—happy styling!