In the modern digital era, branding goes beyond that logo and is more about creating regular and interactive content that reflects on your business or identity. Starting with your social media posts up to the promotional videos, your branding content ought to convey your message instantly. This is easier and more creative with CapCut Desktop Video Editor. Its highly customizable editing features, filters, and even an in-built voice changer enable you to create and adjust branding content that is eye-catching and can create recognition.
This article will help you follow through five steps to the practical of creating and working through branding content in CapCut. At the conclusion, you will have a straightforward procedure on how to develop professional visuals that will enhance your brand.
Why Use CapCut for Branding Content?
CapCut is more than a simple editing app; it is a full-fledged creative suite that enables brands to produce polished videos and images. Drag and drop and customization capabilities provide an opportunity to create content aligned to your brand values and resonating with your target audience.
Step-by-Step Guide to Designing and Editing Branding Content in CapCut
Here’s how to bring your brand vision to life using CapCut Desktop:
Step 1: Open CapCut and Create a New Project
Open CapCut on your computer. On the home page, press on the new project. Choose the media you prefer to utilize, including brand footage, pictures, or graphic details, and click “Open. The files will be loaded in the Media panel, which is located on the left and is ready to use.
Step 2: Add Media and Organize the Timeline
Drag your selected clips and images in the Media panel to the bottom timeline. Organise them as you want your branding content to run. Add your logo and essential brand images into separate tracks in order to superimpose them in your video. Drag clip edges to the timing point.
Step 3: Insert Text, Slogans, and Brand Messaging
Click “Text” in the top menu and select “Add text.” You may put your brand name, product tagline, or company name here. Edit font, size, and color to suit your brand requirements. It is also possible to make the text alive with styles such as Typewriter or Bounce so that the message would be more interesting.
Provided you brand with a consistent typeface, you can import custom fonts into CapCut to maintain the style to match your visual identity.
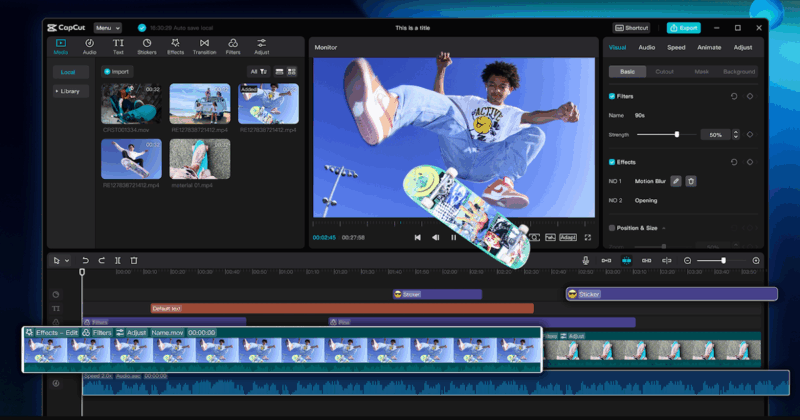
Step 4: Enhance with Audio, Effects, and Motion Graphics
As important as the visuals in branding is sound. To change the audio at the top, click the Audio menu and then pick one of the internal music collections of CapCut or import your own branded audio track or jingle. Drag the audio onto the timeline to match your visuals.
Then, try the menus Effects and Transitions. Effects are used to make brand colors appear, or to introduce moods, and transitions make clips flow well. The flair can also be provided by motion graphics to logos or to accentuate essential product features.
Step 5: Export and Save Branding Content
Once your branding video appears to be polished, there is an Export button that you can find at the upper right. An open window will be displayed that will allow you to select the file name, resolution, format, and save location. Use MP4 to be versatile and choose a resolution, either HD or 4K, to suit your distribution requirements. Lastly, repeat the step of clicking on the Export button, and CapCut will render your video.
Benefits of Using CapCut Tools for Branding Content
CapCut also makes branding content creation easy, which can be done either by beginners or professionals. Here are some key benefits:
- Templates and presets – Customize branding video templates at increased speed using ready-made templates.
- Customization freedom – Custom fonts, colors, effects, and transitions to express the uniqueness of yourself.
- Drag-and-drop editing – Makes editing easier and lets anyone edit like an expert.
- Professional output – Export in high-resolution formats for polished results across platforms.
- All-in-one creative hub – Combine video, images, text, and audio in one place without external apps.
- Resource library – Find free stock music, stickers, and effects to go with your branding.
Conclusion
Good branding content will make you shine in the digital world that has become overcrowded. CapCut Desktop Video Editor provides you with everything to create and do the editing of videos that bring out your brand identity. With a user-friendly five-step procedure of starting a new project, organizing media, adding text, improving it with audio and effects, and exporting, you can create professional branding content without any hassle.
The mix of simplicity of use and a high level of customization is why CapCut is a great option to choose among business owners, marketers, and creators. Be it to create awareness, to promote the products, or to reinforce the voice of your brand, CapCut allows you to create content that resonates with your audience and leaves an unforgettable impression.